I’ve been heavily involved with sensors and remote sensing for many years. Recently, I’ve become intrigued with remote sensing, and began my exploration with LoRaWAN. However, to start experimenting with sensor nodes, I would need a gateway to receive all my node transmissions (as well as send back any data to the nodes). Below is how I built and implemented my outdoor LoRaWAN Gateway.
Bill of Materials
| Part | Quantity | Purchase |
| Raspberry Pi 3 B+ or Raspberry Pi 4 | 1 | Amazon, Amazon |
| Micro SD Card (32 GB) | 1 | Amazon |
| LoRaGo PORT Multi-channel LoRaWAN Gateway | 1 | Sandbox Electronics |
| 915 MHz 8 dBi LoRaWAN Antenna | 1 | Embedded Works |
| IP67 Weatherproof Enclosure | 1 | Amazon |
| Antenna Mast Clamp | 1 | Amazon |
| Passive Power Over Ethernet (PoE) Injector | 2 | Amazon |
| Waterproof Panel Mount RJ45 Connector | 1 | Amazon |
| NEMA Box Vent | 2 | Amazon |
| Antenna Tripod Mount | 1 | Amazon |
| Weatherproof Cable Glands | 1 | Amazon |
| 12-volt 5-Amp Power Adapter | 1 | Amazon |
| Adjustable Voltage Regulator | 1 | Amazon |
| 50 Feet CAT-7 Cable | 1 | Amazon |
| SHT31 Temperature/Humidity Sensor | 1 | Amazon |
Construction
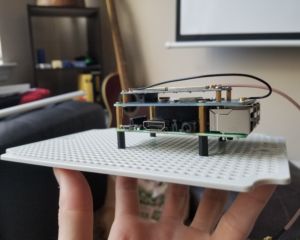
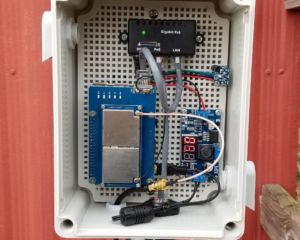
Positioning the components on the back plate of the enclosure was simple enough. There was a lot of room to work with, and I gave consideration to how heat would rise in the case. The Pi was positioned relatively low, with the temperature/humidity sensor positioned near the top to obtain potentially the most extreme conditions of the case.
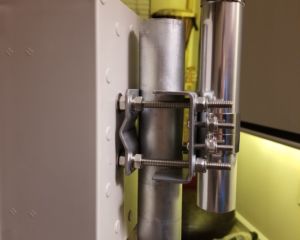
An antenna mast mount was used to secure both the enclosure and the antenna to a 2-inch steel pipe. This pipe was then fixed to a satellite tripod mount. Rubber washers were used both inside and outside of the enclosure to prevent water intrusion through the mount holes.
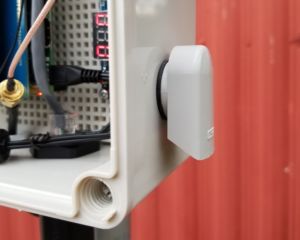
Two vents were installed, with one higher than the other to facilitate airflow that would arise from the heat generated by the Pi and gateway hardware. The 12 volts from the PoE injector was regulated to 5 volts to power the Pi. The LAN was connected from the PoE injector directly to the Pi to provide network connectivity. WiFi could also have been used, however this is often not as reliable as a wired connection. The gateway hardware attached directly to the Pi for both communication and power. The antenna from the gateway exited the enclosure through a weatherproof cable gland and connected to the antenna.
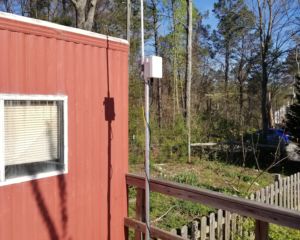
The gateway was bolted to a plywood deck and the CAT-7 ethernet cable was connected to a router to provide internet access for the gateway to send data to The Things Network. This setup could also be modified for use with a custom-built LoRaWAN receiver if one wished to build their own network (i.e. if there was no internet access and all data was fed to a local server).
The area surrounding this gateway is heavily wooded, however I’ve successfully received transmissions from a mile away. The property this is on is only 26 acres, so it easily covers the entire property.
Projects that use this gateway
Remote Radiation Monitoring (2019)
LoRaWAN Tracker and Mapper (2019)
Check out the Projects page to see the most up-to-date list.
Affiliate links
I participant in the Amazon Services LLC Associates Program, an affiliate advertising program designed to provide a means for sites to earn advertising fees by advertising and linking to Amazon.com, and I make a commission for sales made through affiliate links posted on this website.


Hey, nice build. I am planning to do a LoRa project as well.
Did you consider to put just the antenna outside and have all the other parts indoors? If not, why? Might require an RF extension cable but could simplify the build significantly.
Ideally, the antenna should be connected directly to the transceiver. Any added cable results in power loss. Since I couldn’t easily connect the antenna to the transceiver, I opted for the shortest cable I could manage. For a LoRa-specific lecture on maximizing range, see https://youtu.be/BOc3N3Yl38o?t=118
Hi Kyle,
Can you explain how you connected the SHT31 to the Pi GPIO header? It’s not obvious from the images.
best,
Dave
Dave, the SHT31 is an I2C sensor, so all you have to do is connect SDA, SCL, GND, and VIN to the Pi’s SDA, SCL, Ground, and 3.3-Volt pins, respectively.
:) Sorry.. I should have been more specific, given the Sandbox LoRA gateway hat doesn’t expose headers on its top, did you use a header extender on the Pi, or perhaps “witches hat” or other clips to attach the SHT31’s I2C and power connections to the Pi ?
Dave, I don’t have any photos of the sensor connected to the Pi, but I believe I soldered directly to the appropriate pins on the underside of the Pi board.
Thanks for getting back to me so quickly — That’s what I thought — but figured I’d ask in case you had arrived at a different solution.